
You can connect Claude to WordPress in about five minutes with a WordPress MCP server. Once connected, Claude can read your pages, write drafts, edit Elementor layouts and update WooCommerce products, all inside the permissions you choose. This guide walks through the whole setup with HandyMCP, the plugin we build for exactly this job.
What is a WordPress MCP server?
MCP (Model Context Protocol) is an open standard that lets AI apps use tools. A WordPress MCP server is a plugin that turns your site into a set of those tools: “create a page”, “update a product”, “list plugins” and so on. Claude, ChatGPT, Cursor and other MCP apps connect to it with a normal sign-in, then call the tools when you ask for something in plain words.
What you need
- A WordPress site on HTTPS, running WordPress 6.2 or newer and PHP 7.4 or newer.
- An administrator account on that site.
- A Claude plan that supports custom connectors (web, desktop or mobile).
- The HandyMCP plugin. The free version covers Gutenberg, Elementor and content work.
Step 1: Install the WordPress MCP plugin
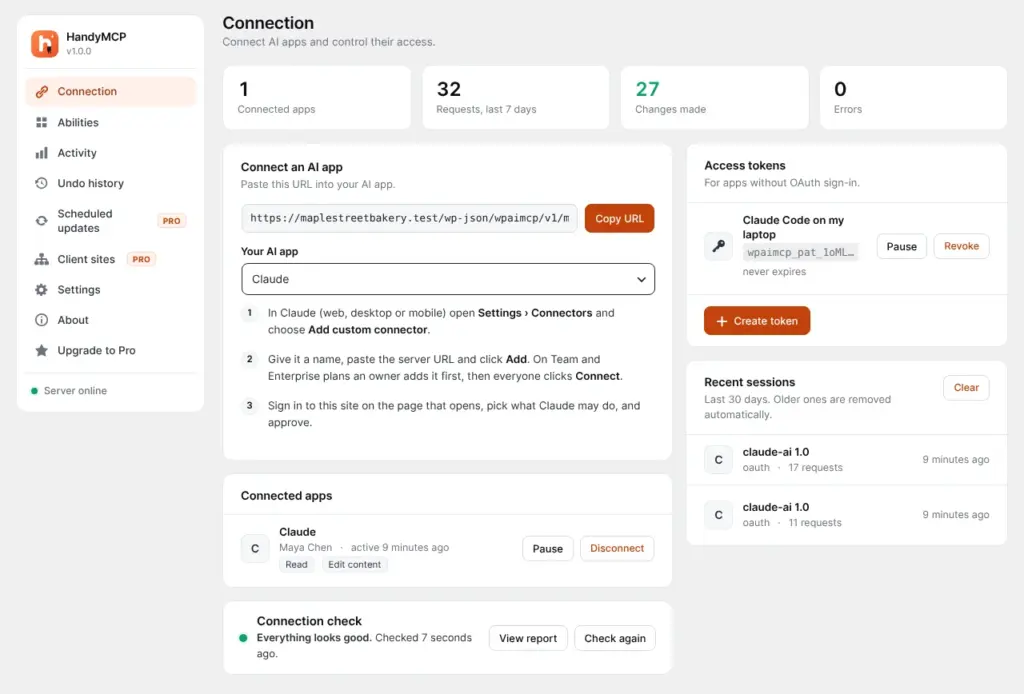
In your dashboard go to Plugins, Add New, upload the HandyMCP zip and activate it. A new HandyMCP menu appears with four screens: Connection, Abilities, Activity and Undo history.
Step 2: Copy your MCP server URL
Open HandyMCP, Connection. At the top you will see your server URL. It looks like https://your-site.com/wp-json/wpaimcp/v1/mcp. Copy it.
Step 3: Add the connector in Claude
- In Claude open Settings, Connectors, and choose Add custom connector.
- Give it a name such as “My WordPress site” and paste the server URL.
- Click Add, then Connect. A page from your own site opens.
- Sign in, choose what Claude may do (read only, edit content, manage the store or manage the site) and approve.
On Team and Enterprise plans an owner adds the connector once, then each person clicks Connect.
Step 4: Try your first prompt
Start a new chat and ask for something small and safe. A few good first prompts:
- “List my pages and tell me which ones have no meta description.”
- “Create a draft landing page for my webinar with Elementor, using my brand colours.”
- “Show me the five products with the lowest stock.”
When you ask for a redesign or a new version, HandyMCP creates a draft and leaves the live page alone, so you can review before anything goes public.
Keeping it safe
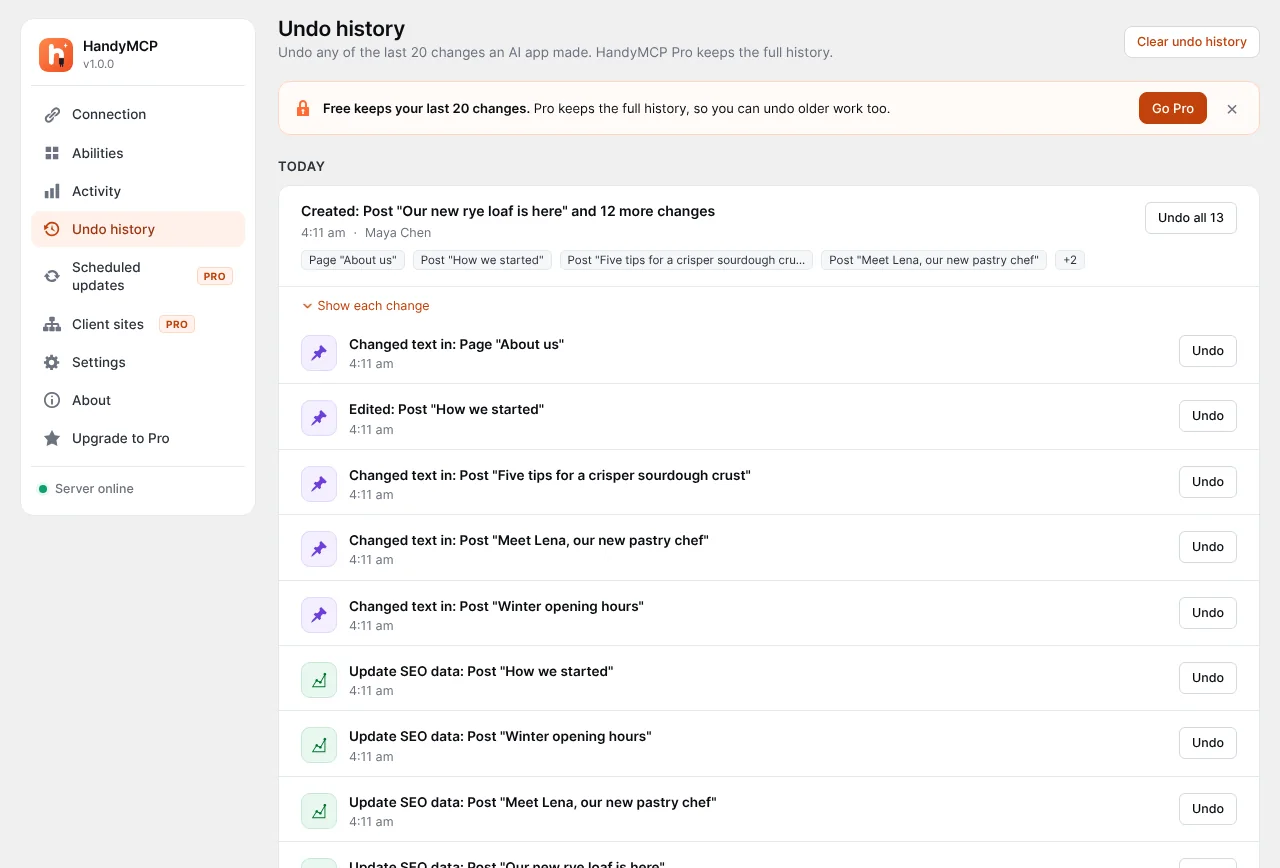
Giving an AI access to your site should never mean giving up control. Under Abilities you can switch whole groups of tools off. Risky actions like deleting content always ask for confirmation. Every request is listed in the Activity log, and every change is saved first, so Undo history can put a page back with one click.
Troubleshooting
- Claude says it cannot connect: make sure the site uses HTTPS and run the Connection check on the Connection screen.
- A security plugin blocks the request: allow
/wp-json/wpaimcp/in its firewall settings. - Claude connects but cannot change anything: check the scopes you approved and that read-only mode is off.
The full HandyMCP documentation has the same steps for ChatGPT, Cursor, VS Code, Windsurf and Gemini CLI. To learn more about the protocol itself, see the official Model Context Protocol site.